• It's Only 1 O'clock And I Finished Something Picture

    From Bob La Londe@none@none.com99 to rec.crafts.metalworking on Fri May 29 13:26:07 2026
    From Newsgroup: rec.crafts.metalworking

    It's only 1 o'clock and I finished a personal project... well sort of.

    I decided to start re-carpeting (or maybe sea decking) some compartment
    lids for my bass boat. I had unscrewed the hinges from the boat a while
    ago. Yesterday I drilled out the rivets holding the hinge to the lid on
    one of them and decided the welding table would be the best place to
    work on them.

    Okay, clear off the welding table again... but most of the stuff on it
    came off the work bench I moved outside, to make room for a new work
    bench I plan to build.

    A whole row of work benches with drawers down the entire back wall of
    the shop is the plan.

    You know if I make one of those benches, I could clear off the welding
    table and clear up a couple other areas as well.

    Okay, let's put off carpeting the compartment lids and clearing the
    welding table and make a work bench...

    Hmm... I have wanted to put a grid of holes on the welding table since I
    built it, but I'd like them to be half way accurate.

    Okay, let's put off making that work bench to make that T-square with
    guide holes for the 5/8 annular cutter I've been thinking about.

    T-square is done. Now I still have to clear off the welding table, if
    only I had a spare work bench to put everything one.

    You know I just might use the work bench I moved outside to re-carpet
    those compartment lids.

    I think I'm going to go sit in my office and design a customer job
    instead of all that. It's getting warm outside. Nice enough for fishing,
    but a little warm for working.

    https://www.yumabassman.com/wp-content/uploads/2026/05/20260529_130638.jpg


    --
    Bob La Londe
    CNC Molds N Stuff

    --- Synchronet 3.22a-Linux NewsLink 1.2
  • From Bob La Londe@none@none.com99 to rec.crafts.metalworking on Fri May 29 13:37:23 2026
    From Newsgroup: rec.crafts.metalworking

    On 5/29/2026 1:26 PM, Bob La Londe wrote:

    https://www.yumabassman.com/wp-content/uploads/2026/05/20260529_130638.jpg


    For anybody who cares. The 5/8 holes are down the center on 2 inch
    centers starting one inch from the cross. The bar has a shelf machined
    in it perpendicular to the row of holes, and one edge of the cross was machined flat and straight to but up against the lip created by
    machining the shelf. With the machined edges butt up snug against each
    other the two parts were vise gripped together. 4 alignment pin holes
    were drilled and reamed with a .001 under reamer. Pins were set using
    the quill on the mill. They were a very light press fit, but I had a
    slight over size lead in to help start them straight, and I covered them
    with green cylindrical surface locker. (sleeve and bearing locker.)
    Then three holes were drilled and tapped through both pieces, and
    clearance drilled half way, and three machine screws cinched down with
    red high strength loctite. I hope I got it square, because it will take
    a torch to get it apart.
    --
    Bob La Londe
    CNC Molds N Stuff
    --- Synchronet 3.22a-Linux NewsLink 1.2
  • From Bob La Londe@none@none.com99 to rec.crafts.metalworking on Fri May 29 13:37:29 2026
    From Newsgroup: rec.crafts.metalworking

    On 5/29/2026 1:26 PM, Bob La Londe wrote:

    https://www.yumabassman.com/wp-content/uploads/2026/05/20260529_130638.jpg


    For anybody who cares. The 5/8 holes are down the center on 2 inch
    centers starting one inch from the cross. The bar has a shelf machined
    in it perpendicular to the row of holes, and one edge of the cross was machined flat and straight to but up against the lip created by
    machining the shelf. With the machined edges butt up snug against each
    other the two parts were vise gripped together. 4 alignment pin holes
    were drilled and reamed with a .001 under reamer. Pins were set using
    the quill on the mill. They were a very light press fit, but I had a
    slight over size lead in to help start them straight, and I covered them
    with green cylindrical surface locker. (sleeve and bearing locker.)
    Then three holes were drilled and tapped through both pieces, and
    clearance drilled half way, and three machine screws cinched down with
    red high strength loctite. I hope I got it square, because it will take
    a torch to get it apart.
    --
    Bob La Londe
    CNC Molds N Stuff
    --- Synchronet 3.22a-Linux NewsLink 1.2
  • From Jim Wilkins@muratlanne@gmail.com to rec.crafts.metalworking on Fri May 29 17:42:14 2026
    From Newsgroup: rec.crafts.metalworking

    "Bob La Londe" wrote in message news:10vcteb$1ukoh$1@dont-email.me...

    On 5/29/2026 1:26 PM, Bob La Londe wrote:

    https://www.yumabassman.com/wp-content/uploads/2026/05/20260529_130638.jpg


    For anybody who cares. ...

    I do care, because I have similar problems accurately laying out and
    drilling hole patterns much larger than my milling machine. The tractor
    bucket loader required matching parallel bearing holes at the ends of the 4' lifting arms, the gantry crane and sawmill matching holes in the 8' track sections.

    --- Synchronet 3.22a-Linux NewsLink 1.2
  • From Bob La Londe@none@none.com99 to rec.crafts.metalworking on Fri May 29 17:02:17 2026
    From Newsgroup: rec.crafts.metalworking

    On 5/29/2026 2:42 PM, Jim Wilkins wrote:
    "Bob La Londe"-a wrote in message news:10vcteb$1ukoh$1@dont-email.me...

    On 5/29/2026 1:26 PM, Bob La Londe wrote:

    https://www.yumabassman.com/wp-content/
    uploads/2026/05/20260529_130638.jpg


    For anybody who cares.-a ...

    I do care, because I have similar problems accurately laying out and drilling hole patterns much larger than my milling machine. The tractor bucket loader required matching parallel bearing holes at the ends of
    the 4' lifting arms, the gantry crane and sawmill matching holes in the
    8' track sections.


    That mill has an X travel of 36 inches. The bar is 51 inches long (a
    little over). Both vises average .0005 - .0009 of parallel to the
    machine over about 20 inches. Good enough for a welding fixture. I
    just cut half the holes, moved the bar, indicated in on one of the
    holes, reset zero and cut the rest of the holes.

    I found all the holes cut with the annular cutter have a taper, and the
    holes cut in my aluminum spacer blocks are slightly smaller than the
    ones get in the steel T-square bar. None of my pins fit even though the measurements said they should. LOL. I'm taking some extra care with
    the pins, because if I make them well I can use them as work stops on
    the welding table when I am done cutting holes in it.

    I have one more pin to make (for now) and one more cutting guide. The
    other cutting guide is a single hole guide to locate the first hole on
    the corner of the plate.

    I thought I was done with the T-square, but I think I'm going to have to
    run a reamer through all the holes.
    --
    Bob La Londe
    CNC Molds N Stuff
    --- Synchronet 3.22a-Linux NewsLink 1.2
  • From Bob La Londe@none@none.com99 to rec.crafts.metalworking on Fri May 29 18:04:39 2026
    From Newsgroup: rec.crafts.metalworking

    On 5/29/2026 5:02 PM, Bob La Londe wrote:
    On 5/29/2026 2:42 PM, Jim Wilkins wrote:
    "Bob La Londe"-a wrote in message news:10vcteb$1ukoh$1@dont-email.me...

    On 5/29/2026 1:26 PM, Bob La Londe wrote:

    https://www.yumabassman.com/wp-content/
    uploads/2026/05/20260529_130638.jpg


    For anybody who cares.-a ...

    I do care, because I have similar problems accurately laying out and
    drilling hole patterns much larger than my milling machine. The
    tractor bucket loader required matching parallel bearing holes at the
    ends of the 4' lifting arms, the gantry crane and sawmill matching
    holes in the 8' track sections.


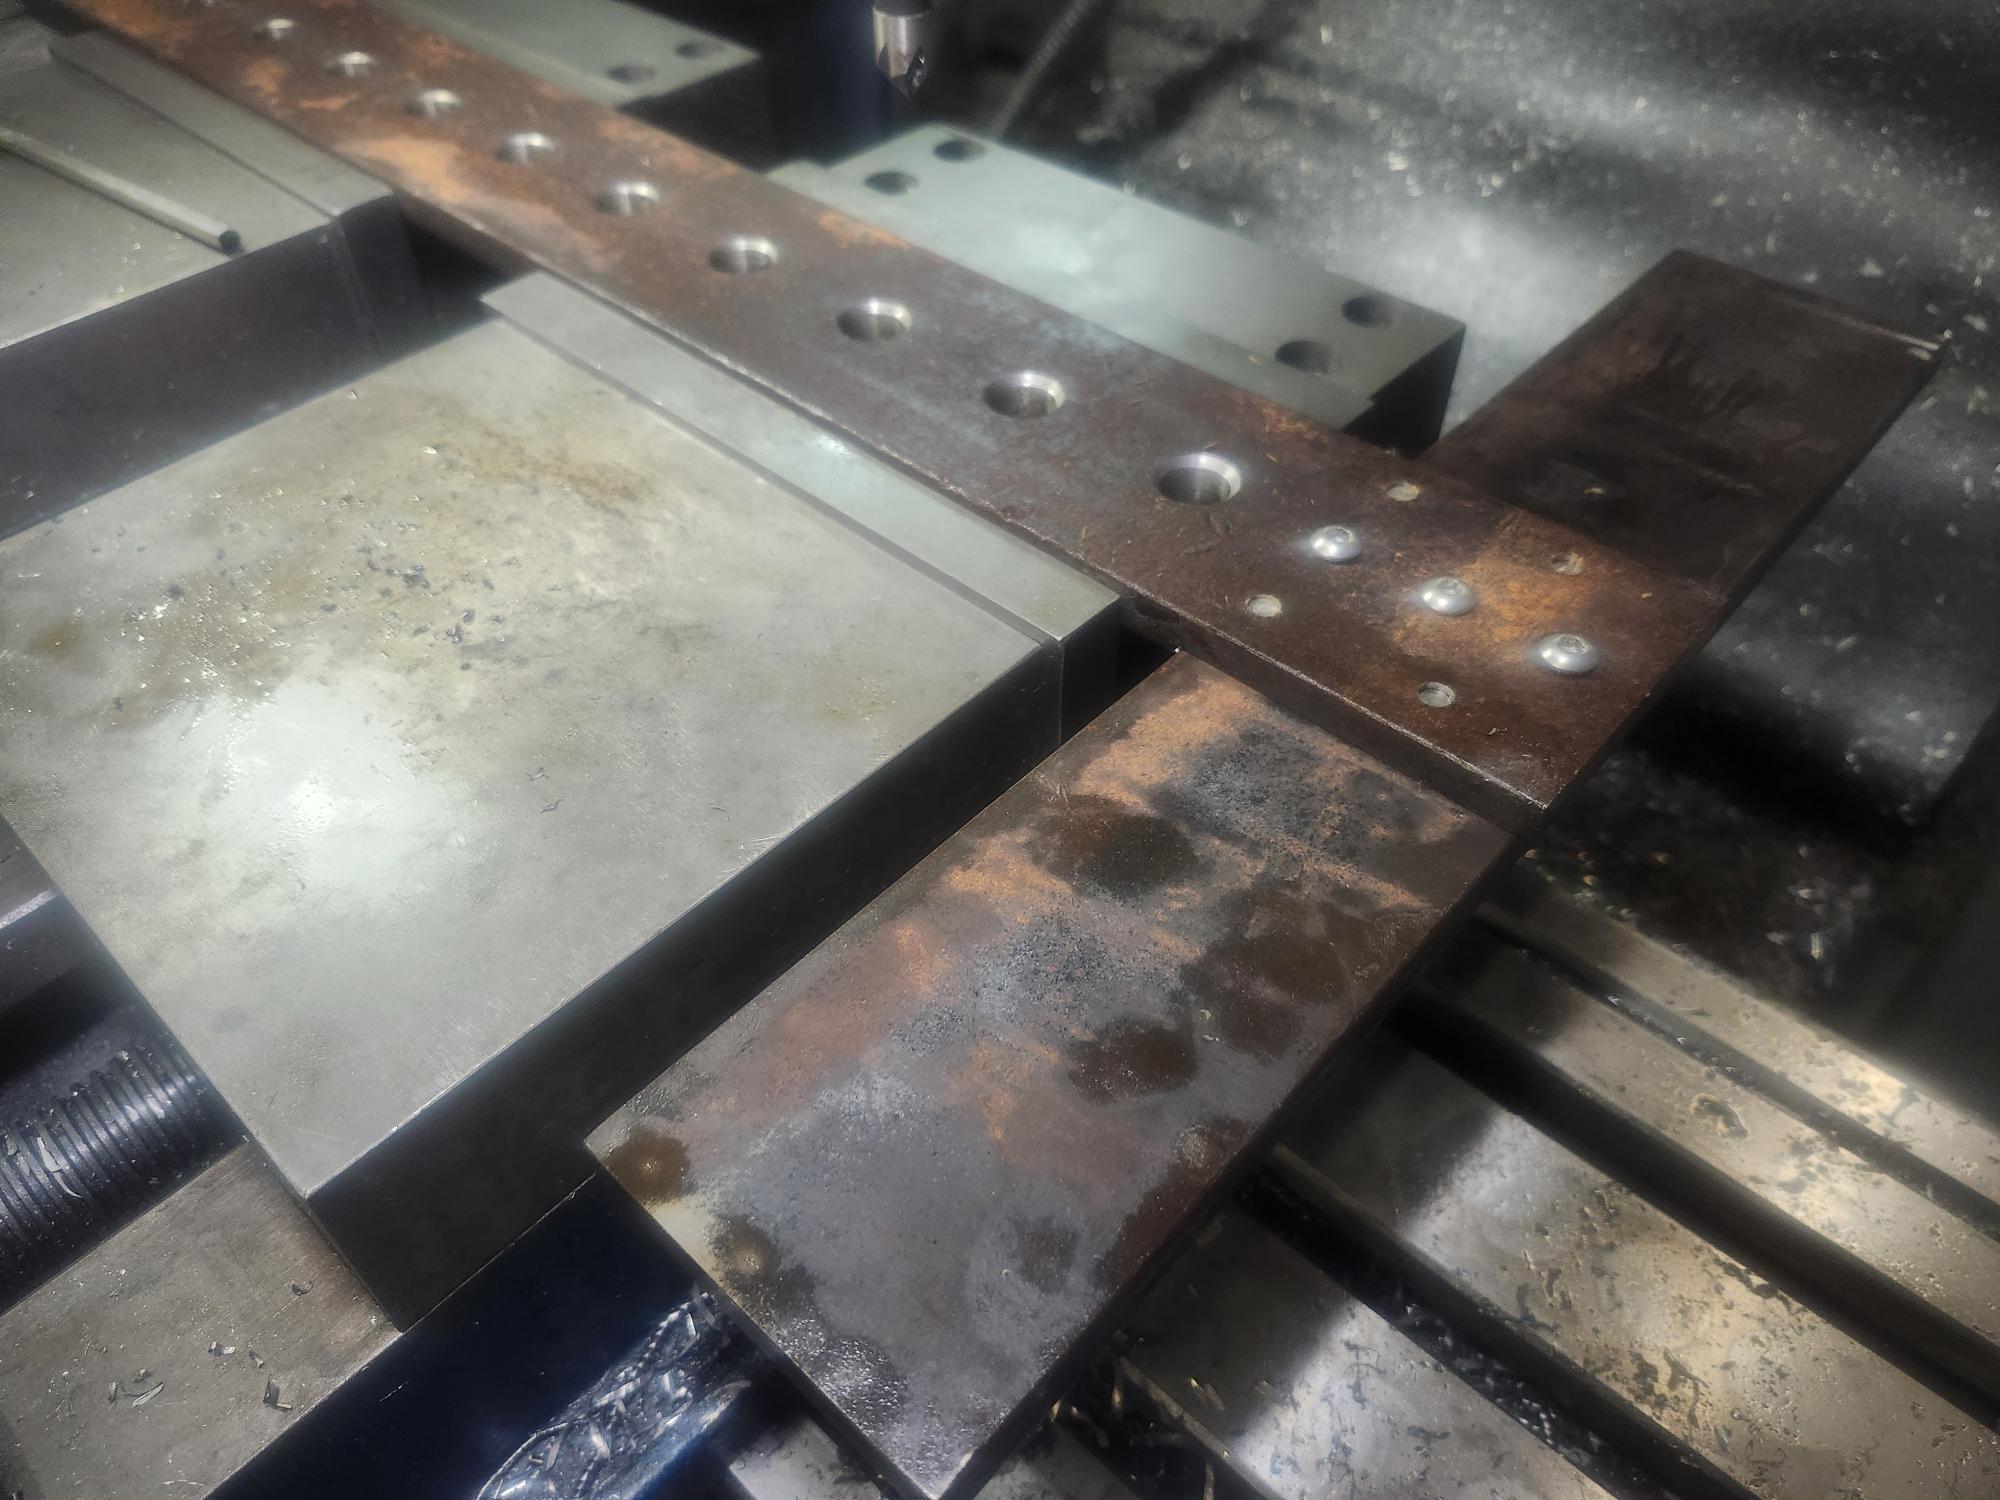
    That mill has an X travel of 36 inches.-a The bar is 51 inches long (a little over).-a Both vises average .0005 - .0009 of parallel to the
    machine over about 20 inches.-a Good enough for a welding fixture.-a I
    just cut half the holes, moved the bar, indicated in on one of the
    holes, reset zero and cut the rest of the holes.

    I found all the holes cut with the annular cutter have a taper, and the holes cut in my aluminum spacer blocks are slightly smaller than the
    ones get in the steel T-square bar.-a None of my pins fit even though the measurements said they should.-a LOL.-a I'm taking some extra care with
    the pins, because if I make them well I can use them as work stops on
    the welding table when I am done cutting holes in it.

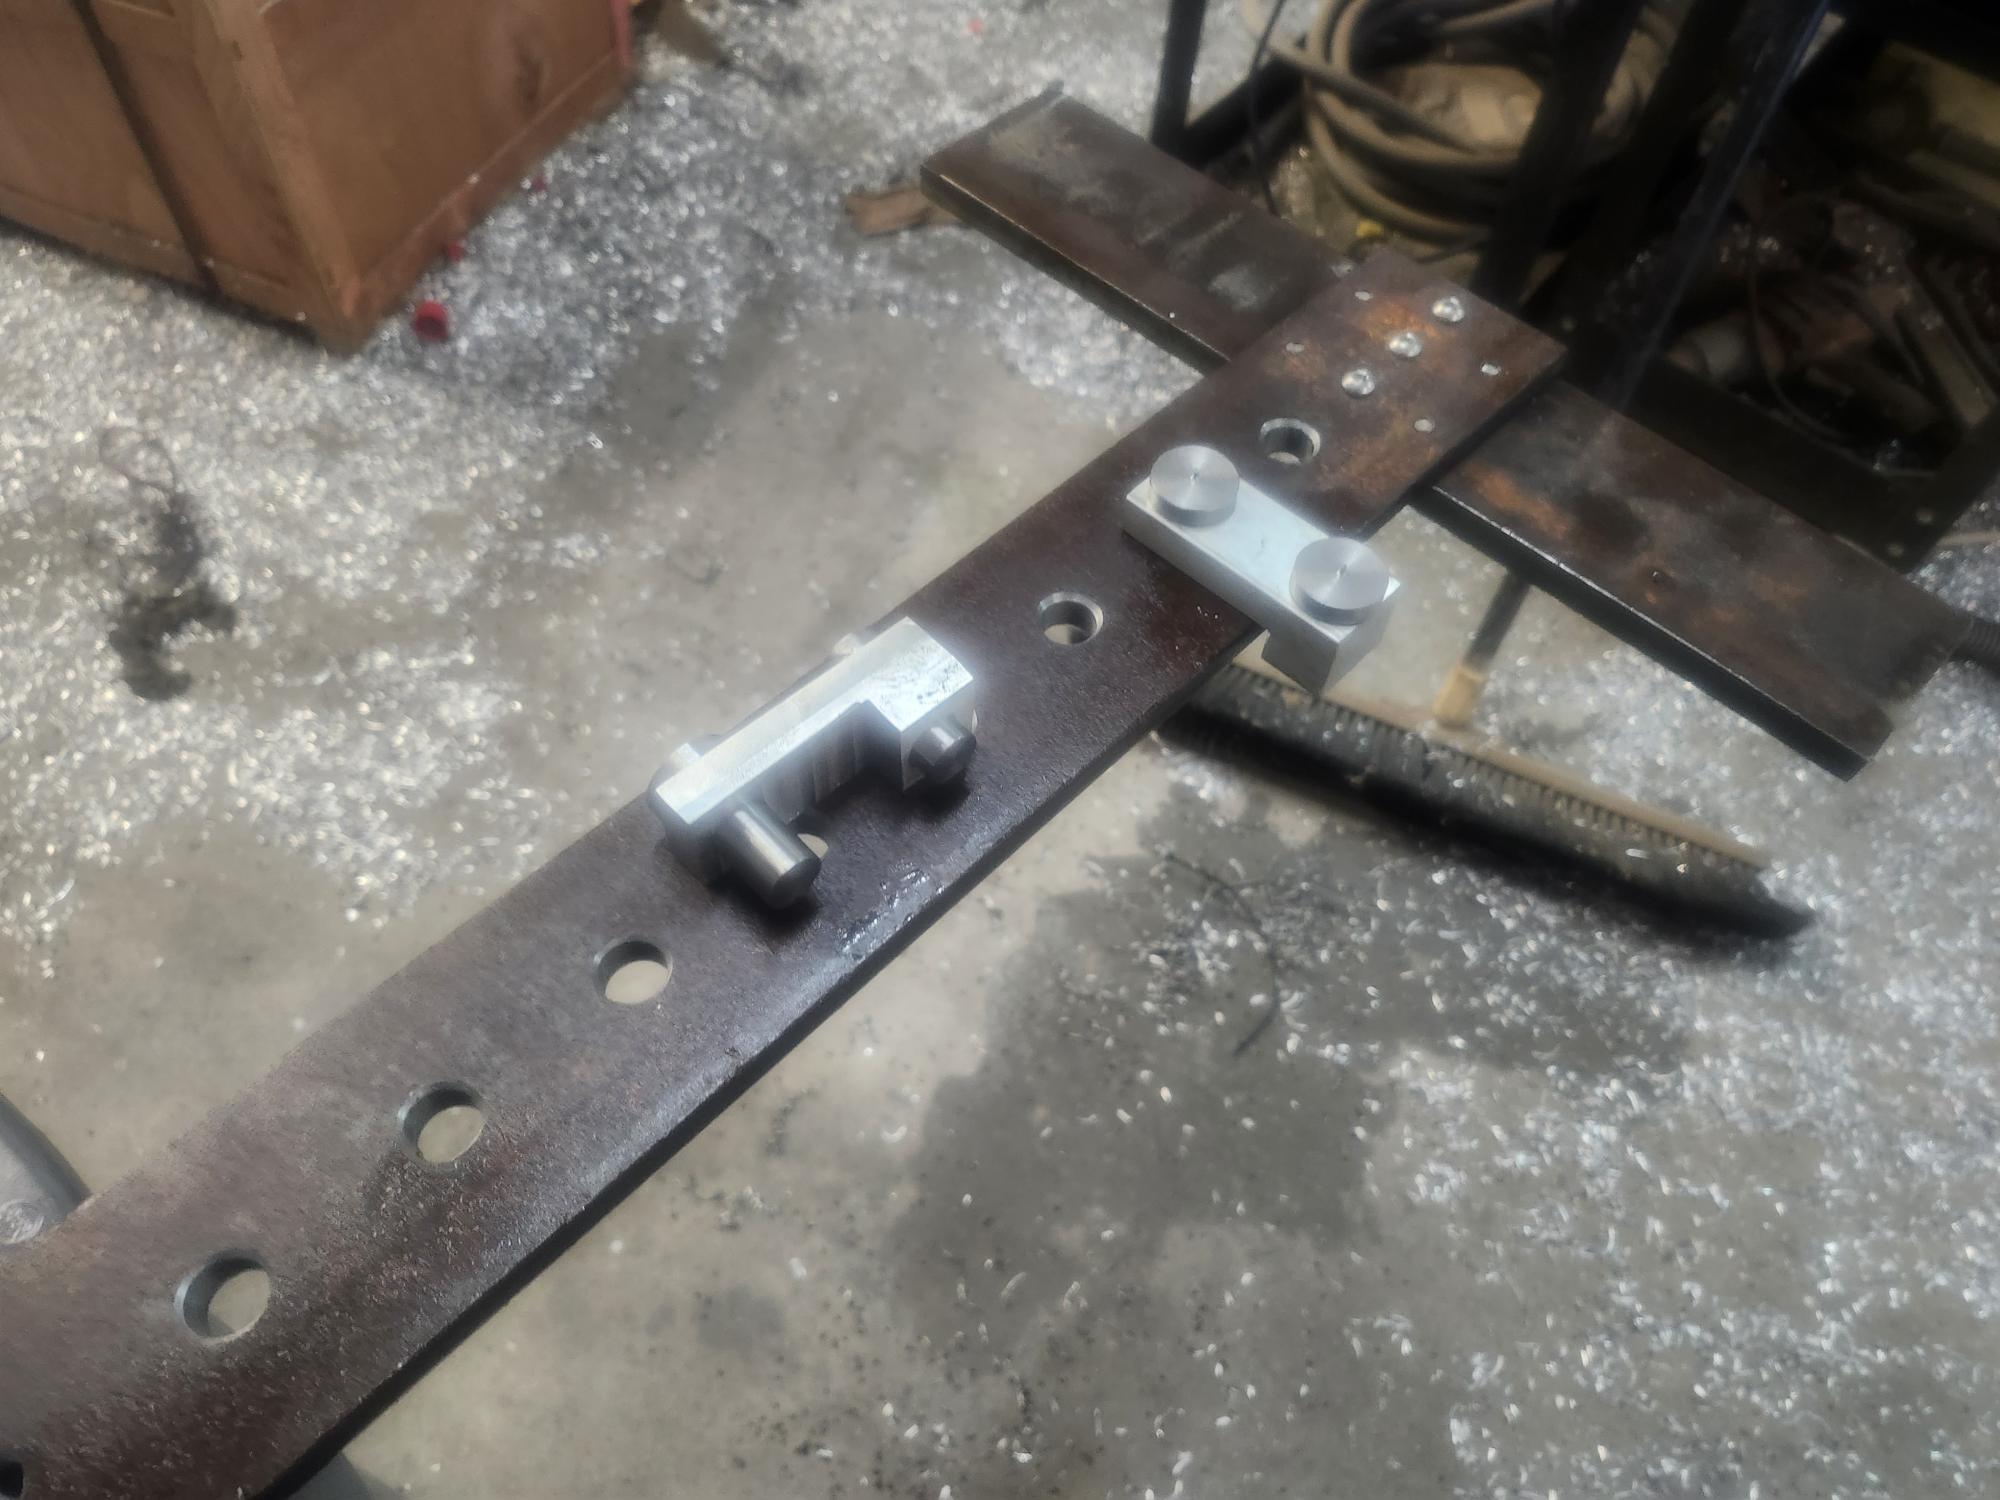
    I have one more pin to make (for now) and one more cutting guide.-a The other cutting guide is a single hole guide to locate the first hole on
    the corner of the plate.

    I thought I was done with the T-square, but I think I'm going to have to
    run a reamer through all the holes.


    https://www.yumabassman.com/wp-content/uploads/2026/05/20260529_175611.jpg

    https://www.yumabassman.com/wp-content/uploads/2026/05/20260529_175618.jpg
    --
    Bob La Londe
    CNC Molds N Stuff
    --- Synchronet 3.22a-Linux NewsLink 1.2
  • From Jim Wilkins@muratlanne@gmail.com to rec.crafts.metalworking on Sat May 30 07:05:10 2026
    From Newsgroup: rec.crafts.metalworking

    "Bob La Londe" wrote in message news:10vdd36$1v5hn$1@dont-email.me...

    https://www.yumabassman.com/wp-content/uploads/2026/05/20260529_175611.jpg

    https://www.yumabassman.com/wp-content/uploads/2026/05/20260529_175618.jpg

    I turn one or more grooves in the heads of locating pins to make them easier to remove if a snug fit. Either a threading or parting tool works. I used to knurl them, grooves don't deform the edges and they fit a collet better if the pin needs trimming. Grooves near the ends make the bushings that hold screws in collets easier to extract.

    --- Synchronet 3.22a-Linux NewsLink 1.2
  • From Bob La Londe@user16941@newsgrouper.org.invalid to rec.crafts.metalworking on Sat May 30 15:40:59 2026
    From Newsgroup: rec.crafts.metalworking


    "Jim Wilkins" <muratlanne@gmail.com> posted:

    "Bob La Londe" wrote in message news:10vdd36$1v5hn$1@dont-email.me...

    https://www.yumabassman.com/wp-content/uploads/2026/05/20260529_175611.jpg

    https://www.yumabassman.com/wp-content/uploads/2026/05/20260529_175618.jpg

    I turn one or more grooves in the heads of locating pins to make them easier to remove if a snug fit. Either a threading or parting tool works. I used to knurl them, grooves don't deform the edges and they fit a collet better if the pin needs trimming. Grooves near the ends make the bushings that hold screws in collets easier to extract.


    That's a good idea. I will certainly make more of these pins along with spacer blocks to be able to quickly build setups.
    --
    Bob La Londe
    CNC Molds N Stuff
    --- Synchronet 3.22a-Linux NewsLink 1.2
  • From Bob La Londe@none@none.com99 to rec.crafts.metalworking on Sat May 30 11:45:35 2026
    From Newsgroup: rec.crafts.metalworking

    On 5/30/2026 8:40 AM, Bob La Londe wrote:

    "Jim Wilkins" <muratlanne@gmail.com> posted:

    "Bob La Londe" wrote in message news:10vdd36$1v5hn$1@dont-email.me...

    https://www.yumabassman.com/wp-content/uploads/2026/05/20260529_175611.jpg >>
    https://www.yumabassman.com/wp-content/uploads/2026/05/20260529_175618.jpg >>
    I turn one or more grooves in the heads of locating pins to make them easier >> to remove if a snug fit. Either a threading or parting tool works. I used to >> knurl them, grooves don't deform the edges and they fit a collet better if >> the pin needs trimming. Grooves near the ends make the bushings that hold
    screws in collets easier to extract.


    That's a good idea. I will certainly make more of these pins along with spacer blocks to be able to quickly build setups.


    The current 4 pins have head 1 inch heads. On the 2 x 2 grid that gives
    me all the odd number inch measurements for setting up a fixture. I
    figure it I make some 2 inch blocks to set under the pin heads that will
    give me all the even number increments. As a counter to your idea of a groove, I also considered drilling and tapping the pins. Since I make
    them on the lathe, it wouldn't be any big deal to pop a 1/4-20 hole in
    the top when I turn them aroung to clean up the heads, and it would
    leave the ability to keep them low profile, or make taller ones as needed.

    Eventually I'll probably need about a dozen pins and a dozen blocks.
    I'm not sure sure about hold downs since my table top is only 1/4 inch
    thick. I'm not sure that is enough racking action to get a good bind
    without damaging the table top. I'm not crazy about putting a nut or a
    bolt on the bottom. I'll probably just keep using Vise grip style
    welding clamps with swivel pads. (The hard pad ones always seem to be
    less well built and twist.)
    --
    Bob La Londe
    CNC Molds N Stuff
    --- Synchronet 3.22a-Linux NewsLink 1.2
  • From Jim Wilkins@muratlanne@gmail.com to rec.crafts.metalworking on Sat May 30 17:00:21 2026
    From Newsgroup: rec.crafts.metalworking

    "Bob La Londe" wrote in message news:10vfb8d$11muv$1@dont-email.me...

    The current 4 pins have head 1 inch heads. On the 2 x 2 grid that gives
    me all the odd number inch measurements for setting up a fixture. I
    figure it I make some 2 inch blocks to set under the pin heads that will
    give me all the even number increments. As a counter to your idea of a
    groove, I also considered drilling and tapping the pins. Since I make
    them on the lathe, it wouldn't be any big deal to pop a 1/4-20 hole in
    the top when I turn them aroung to clean up the heads, and it would
    leave the ability to keep them low profile, or make taller ones as needed.

    Eventually I'll probably need about a dozen pins and a dozen blocks.
    I'm not sure sure about hold downs since my table top is only 1/4 inch
    thick. I'm not sure that is enough racking action to get a good bind
    without damaging the table top. I'm not crazy about putting a nut or a
    bolt on the bottom. I'll probably just keep using Vise grip style
    welding clamps with swivel pads. (The hard pad ones always seem to be
    less well built and twist.)
    --
    Bob La Londe
    CNC Molds N Stuff

    ---------------------------------------

    The grooves are the simplest, if you have fingernails. They are not the
    best.

    A 5/8" square plate on the lower end of a through bolt could be adjusted
    with a locknut to retain or release the plugs, and the upper end could
    attach your hold-downs.

    --- Synchronet 3.22a-Linux NewsLink 1.2
  • From Jim Wilkins@muratlanne@gmail.com to rec.crafts.metalworking on Sat May 30 17:18:55 2026
    From Newsgroup: rec.crafts.metalworking

    "Jim Wilkins" wrote in message news:10vfj3v$140aq$1@dont-email.me...

    A 5/8" square plate ...

    I looked up standard welding table hole patterns and confused a photo of
    5/8" square holes (like my anvil) with your project.

    --- Synchronet 3.22a-Linux NewsLink 1.2